The contents of this post relate to EAD 2002.
With pictures!
(Disclaimers–this is not for an institutional setting. Also, this is geared toward Windows users. Specifically, I’m installing XAMPP on a Windows 7 machine. I’ve installed it on XP as well and still have an XP installation running at work. There are other ways to install & run AT locally. This is what I do.)
Installing Archivists’ Toolkit on your own computer makes sense for a lot of budding archivists. If we’re not using it at work, our free time may be the best way to build relevant experience. But why not just use the sandbox database which AT has graciously provided?
A few reasons to have the database installed locally:
- You want to keep your experiments private or are working with non-public data.
- You want to be able to work offline.
- You’re trying to create something more permanent and don’t want to risk its deletion by another user.
- You’re worried that the sandbox might someday go away.
- You can use phpMyAdmin to easily backup the database and move it elsewhere.
- You want a little phpMyAdmin experience or are interested in running other things on a local database
Let’s get started.
Step 1: Install XAMPP on your computer
What is XAMPP? It’s a simplified Apache distribution with PHP, MySQL, and Perl. The Windows version includes Apache, MySQL, PHP + PEAR, Perl, mod_php, mod_perl, mod_ssl, OpenSSL, phpMyAdmin, Webalizer, Mercury Mail Transport System for Win32 and NetWare Systems v3.32, Ming, FileZilla FTP Server, mcrypt, eAccelerator, SQLite, and WEB-DAV + mod_auth_mysql, so there’s a lot more you can do with it. For example, I run locally-hosted WordPress sites where I edit themes and such (I hand-wrote the theme for ruthtillman.com on a local site).
If you don’t know what that means, don’t panic. It’s a small server you can run on your computer. It won’t be hooked up to the internet, so you don’t have to worry about people breaking in and you can use it whether or not you’re online.
Scroll down on the windows download page and select the download option. Since we’re doing this easy-style, select the Installer option below. This will be a .exe file.
The download link will likely take you to SourceForge, which is a legitimate download site. Once you’ve downloaded the installation file, double-click like any program you’ve installed before. You may get a warning that firewall or antivirus will slow down installation. That’s fine, I just chose to keep them on anyway.
During setup, you’ll have an option of what you want to install. I recommend installing everything it offers. At the least you’ll need MySQL and phpMyAdmin (Apache and PHP cannot be unchecked). I chose NOT to learn more about Bitnami, which can help one install WordPress and more on the computer.
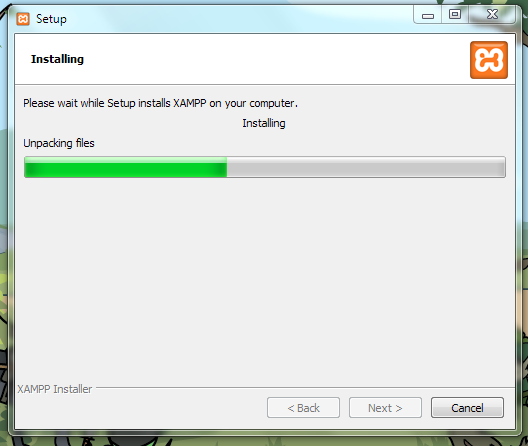
XAMPP will then install on your computer. It may take a while.
When XAMPP has finished installing, choose to start the control panel. You will always need the control panel to be running to use Archivists’ Toolkit.

In order to set up (or, once installed, turn on) your database, you’ll need to click Start on both Apache and MySQL (arrows below point to the relevant buttons, which currently read Stop, since I’ve already turned it on).

When you do this the first time, you may get the following error message from the Windows firewall.

That’s fine, allow it to connect.
Step 2: Setting up a Local database for Archivists’ Toolkit
Now, go to http://localhost/phpmyadmin/ in your browser (this link will only work if you’ve already installed and activated XAMPP). You may see a notice that your root user doesn’t have a password setup. As long as you’re just running this locally, it doesn’t matter. You probably don’t need to upgrade phpMyAdmin, if it’s a slightly older version.
Click the Databases tab at the top and use the create database box to create your database as below. I’m calling mine “atdatabase.” I simply selected “Collation” as the type.

Under the Users tab, create a new user. I chose to create one simply called atuser with the password eadiva. I clicked the Check All option to give atuser access to all the databases (this is a bit of a short-cut, but for the purposes of running AT it works just fine). Click “Go” at the bottom right corner to create the user.

After the database and user have been created, we’ll switch over to installing Archivists’ Toolkit itself. Leave the XAMPP control panel open and on.
Step 3: Install Archivists’ Toolkit and Initialize the Database
Download the most recent update of release 2.0 and execute the installation file.
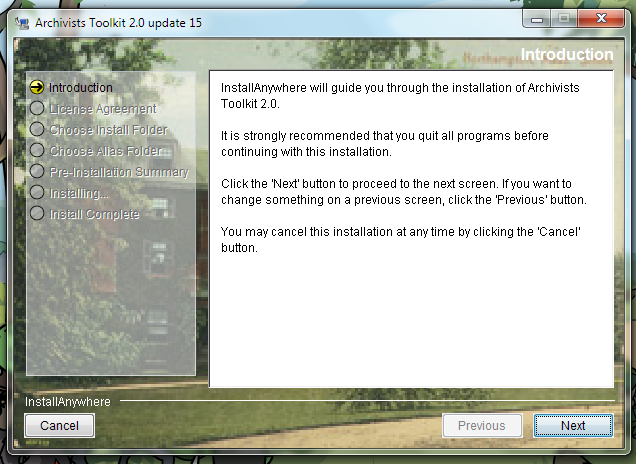
Walk through the basic installation steps.
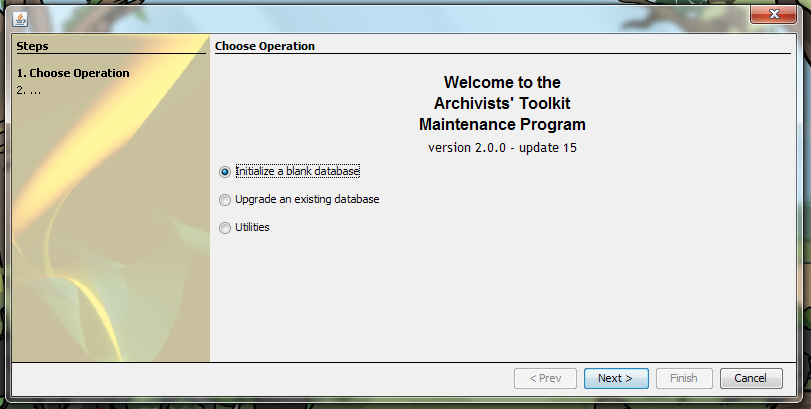
Then open C:/Program Files (x86)/Archivists Toolkit 2.0 (or wherever your program files are stored). Execute Maintenance Program 2.0.exe.

Select “Initialize a blank database.”
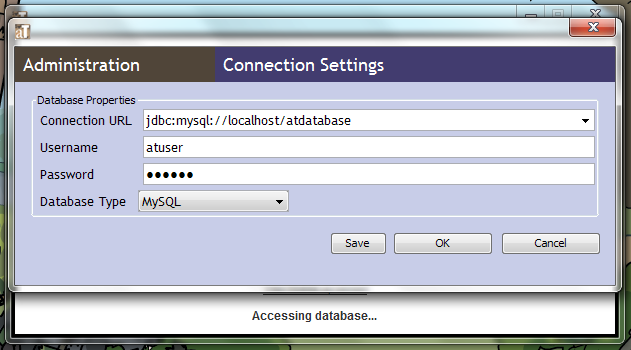
Enter the location of your database, the username and password, and the type.
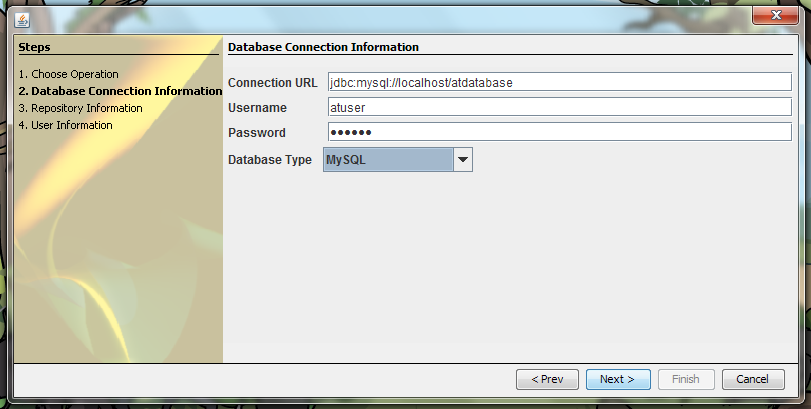
The information entered in the image above is:
jdbc:mysql://localhost/atdatabase
atuser
eadiva
MySQL
Your database location should begin with jdbc:mysql://localhost/ and be followed by the name of your database.
The next screen will prompt you to enter a repository name:
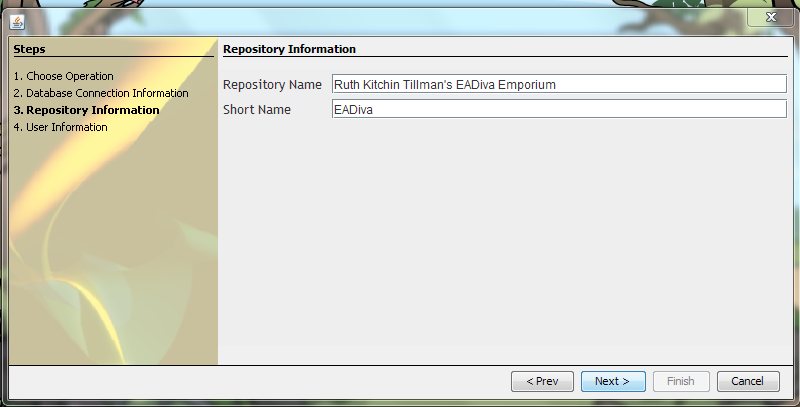
Call it whatever you like, but be aware that it’ll require work to change later. The next screen prompts you to enter a username and password. Enter something you’ll remember or *gasp* write it down (I would never advocate for this for a real repository or an important password, but this is just a local installation of AT). I use my initials for both.
Then click Finish at let the software initialize your database. This will create the tables that AT needs to function. It may take a little while. During all of this, you’ll need to have had your XAMPP turned on or else the database can’t initialize.
Step 4: Set up Archivists’ Toolkit
When done initializing, open the newly-installed Archivists’ Toolkit.
It will require you to enter the database login information. As before, for mine, it’s:
jdbc:mysql://localhost/atdatabase
atuser
eadiva
MySQL
and click Save.
It will then prompt you for the username and password you created during initialization (the ones for which I used my initials).
Once in, you can start using Archivists’ Toolkit. Your initial password will give you superuser (fullest) access to the software. You may Setup -> Users to create users with a variety of privileges and test out what you can and can’t do.
How to use AT once you’ve installed a local copy is a whole ‘nother tutorial series.
Step 6: How to start Archivists’ Toolkit next time
When you finish with AT the first time, simply exit out and close XAMPP. You will have to open XAMPP and press the Quit button in order to close it.
In order to restart AT, you’ll need to start XAMPP first. Simply open it from your Programs list or wherever you’ve put a shortcut. Turn on Apache and MySQL again just as you did before.
Now you can open AT. This time it will automatically access the database and simply prompt you for your login.
Should you wish to create and initialize multiple databases or to access both the sandbox AND your local database from your AT installation, you’ll have the option to “Select Server” when logging in, which lets you change the server you’ll be logging into.
I’ve tried to make this tutorial thorough and heavily-illustrated, since once you have AT running it doesn’t take nearly as much technical savvy to use. Please comment below or contact me if you have any questions and I’ll do my best to answer and clarify the tutorial.
